


Free Windows Client
Why not try our Free Windows client that automatically sets your DNS and keeps your IP validated on our network?
Download TellyAbroad Windows Client
Important:
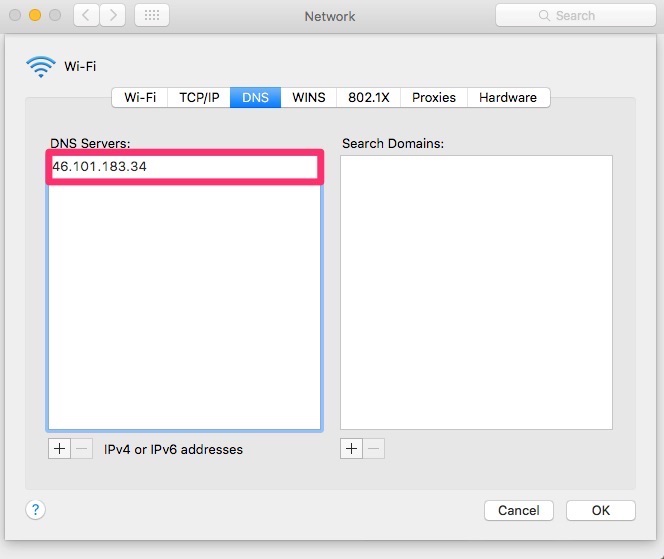
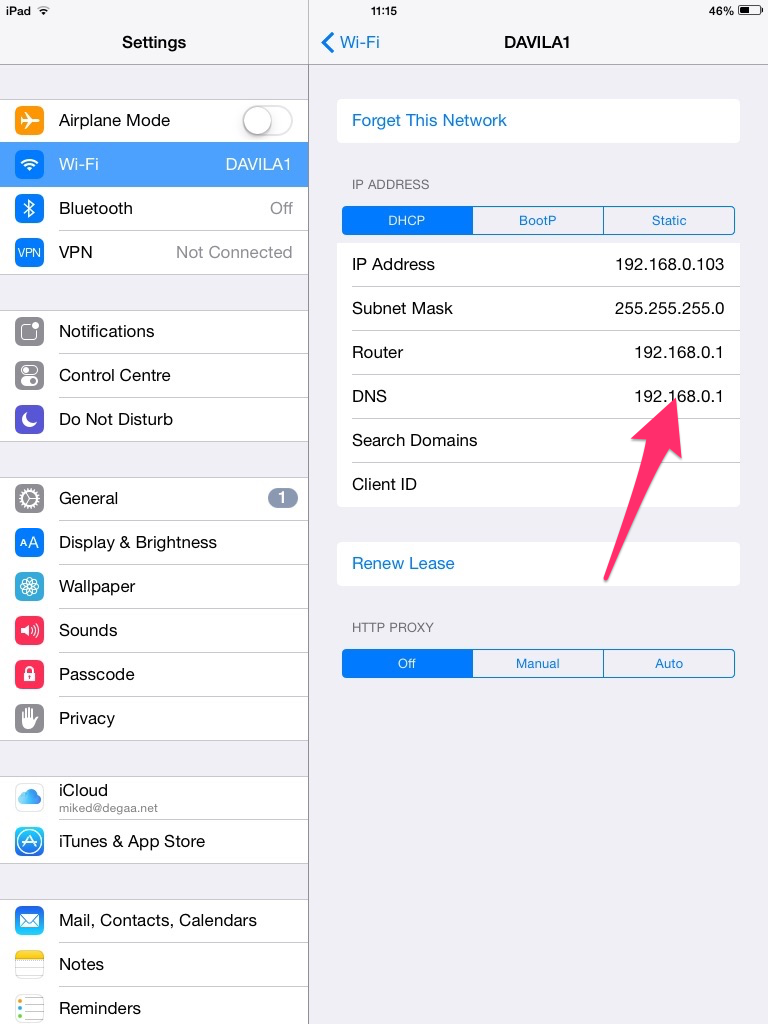
Before you change your DNS settings to use TellyAbroad, be sure to write down the current server addresses or settings on a piece of paper. It is very important that you keep these numbers for backup purposes, in case you need to revert to them at any time. We also recommend that you print this page, in the event that you encounter a problem and need to refer to these instructions.
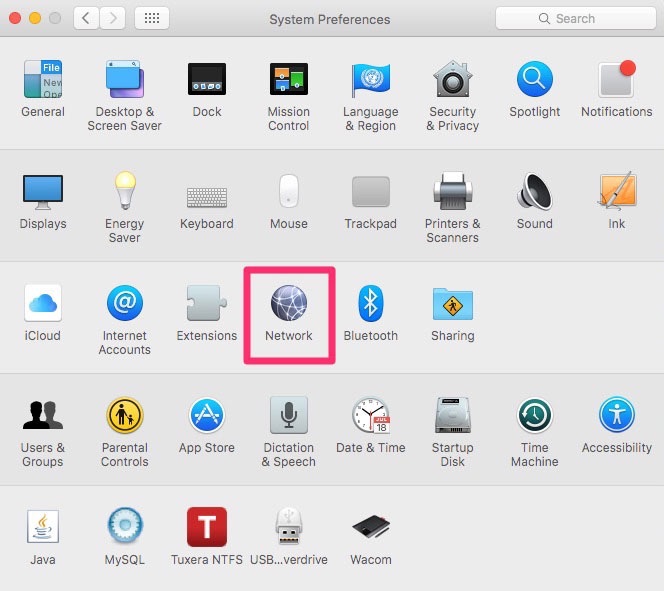
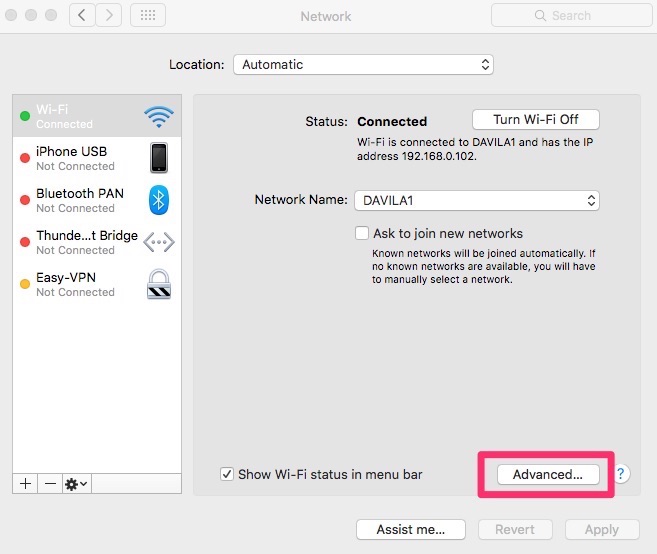
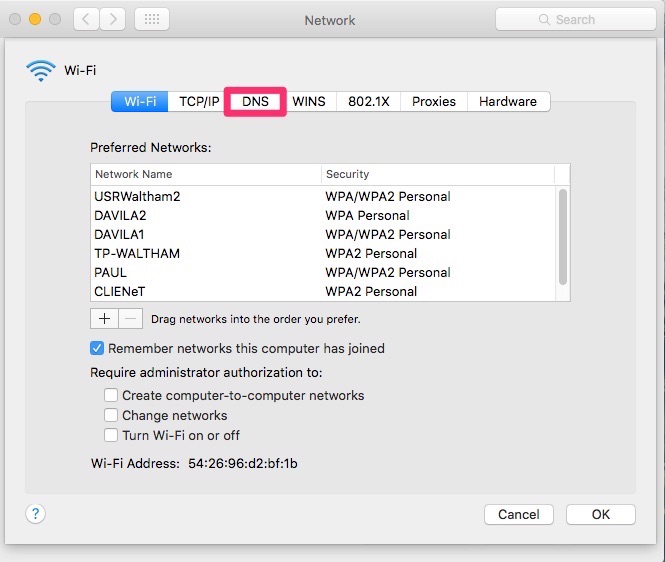
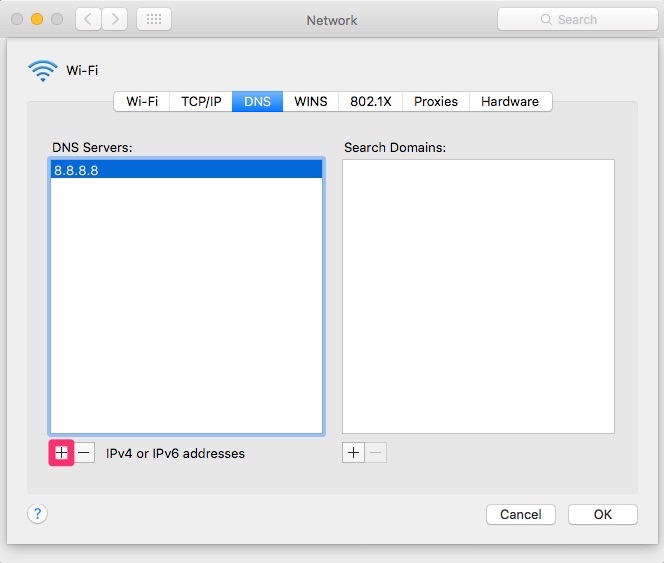
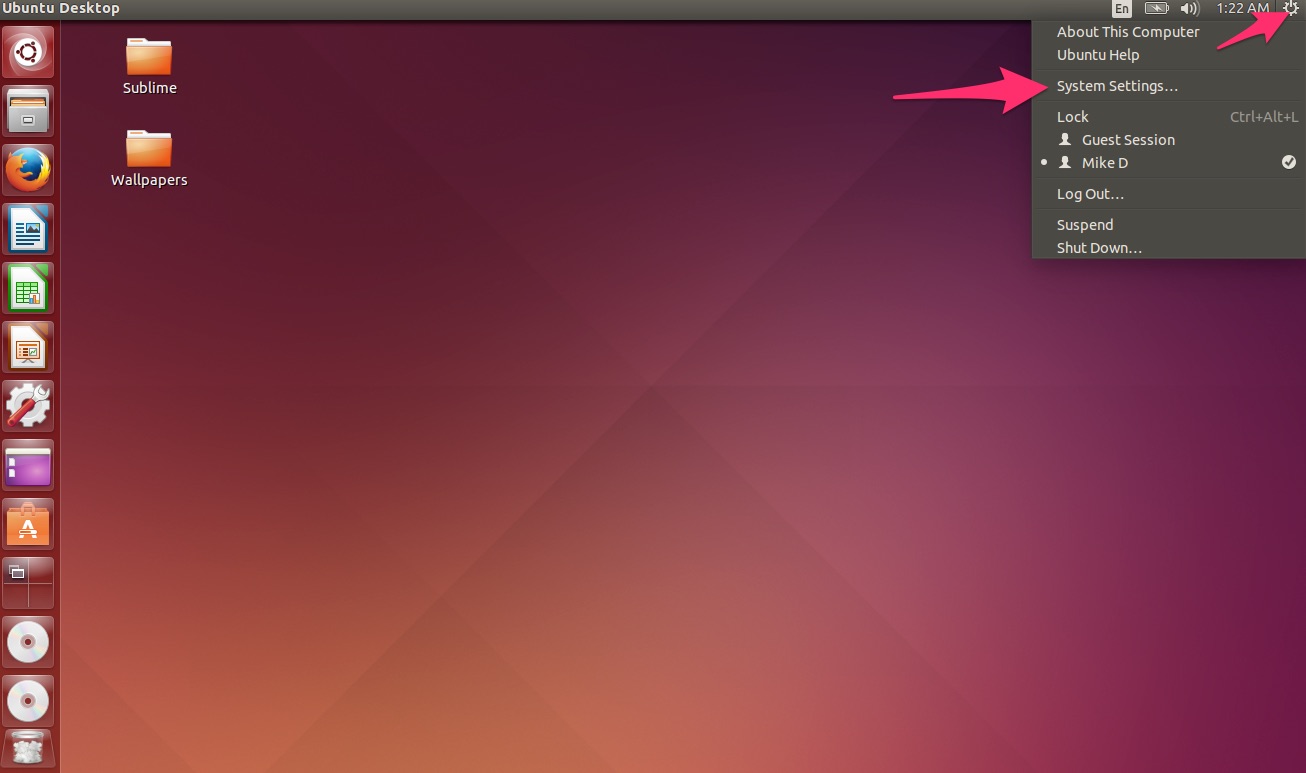
Instructions:
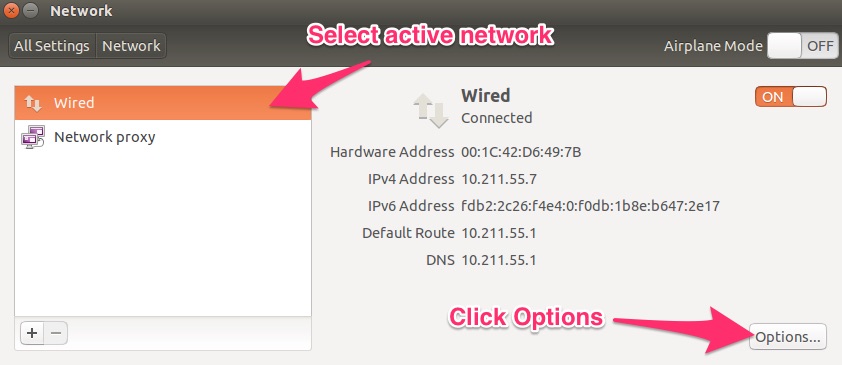
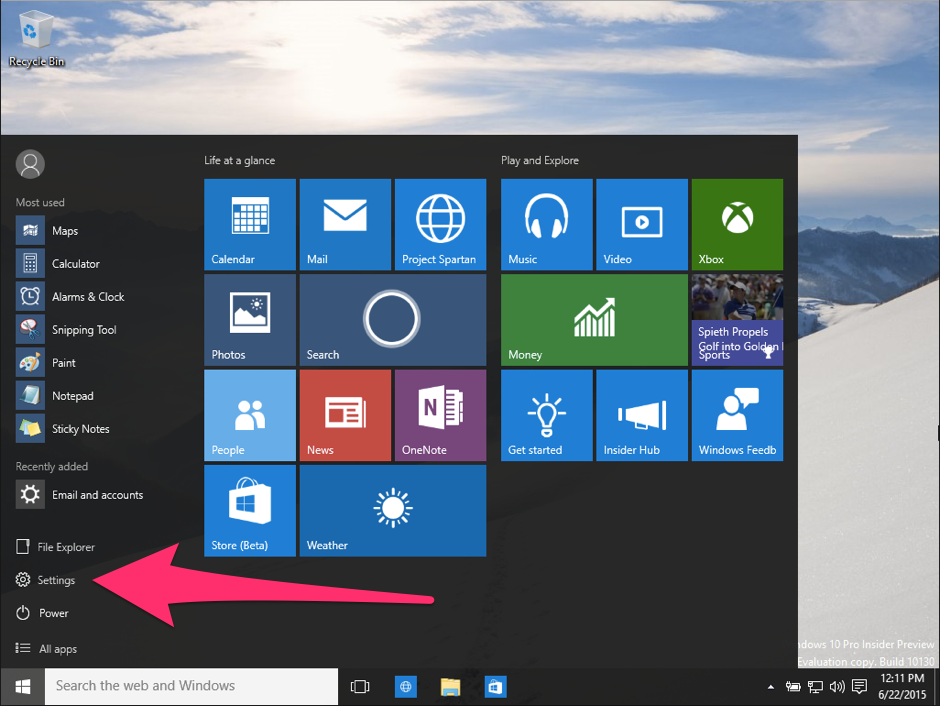
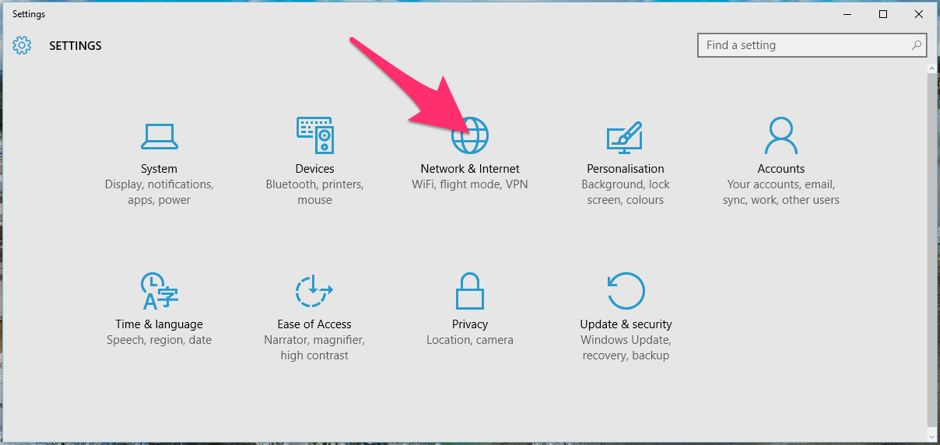
From the desktop click the start button then “settings”
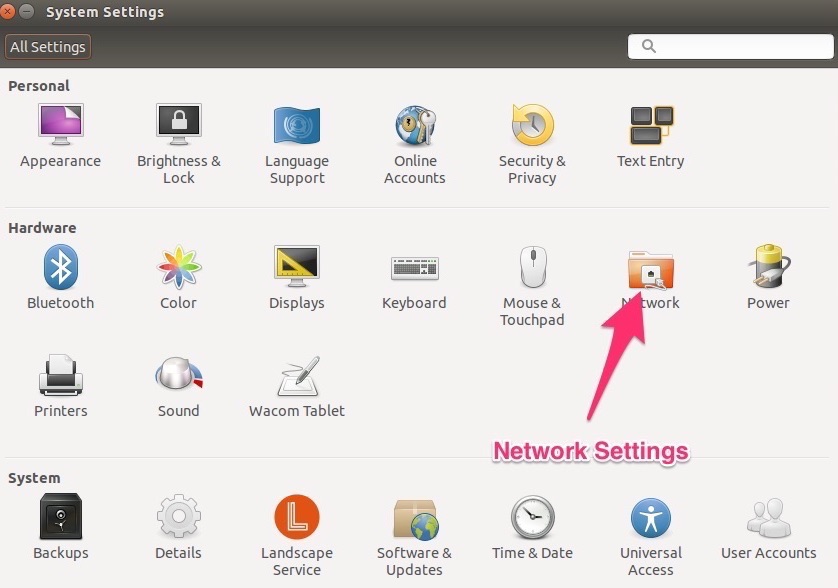
Click on “Network and Internet”
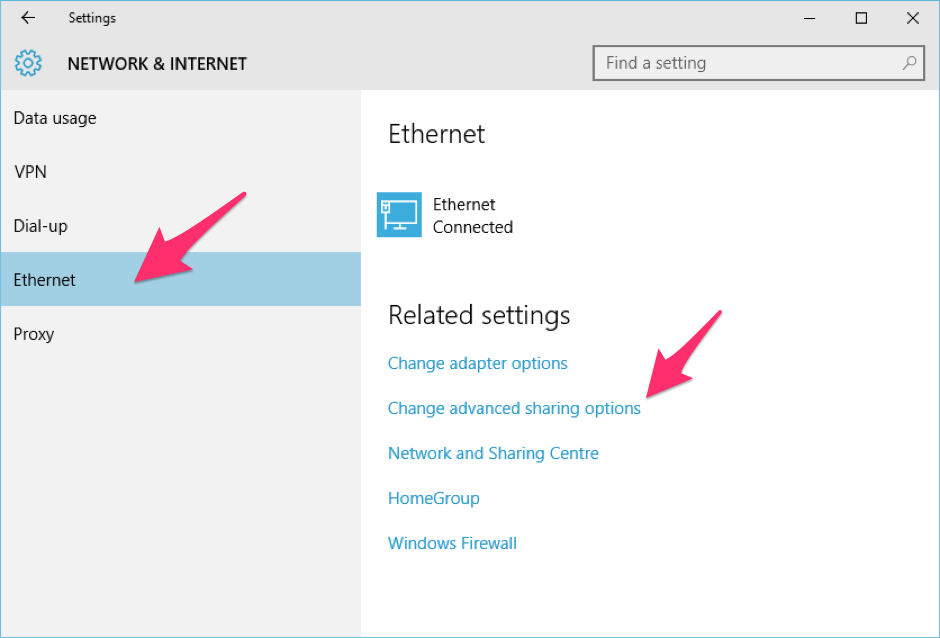
Click on WiFi or Ethernet (this will depend on how you are connected to the internet). Then click “Change adaptor options”
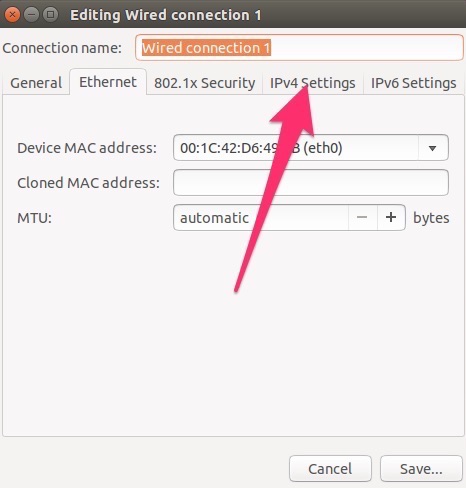
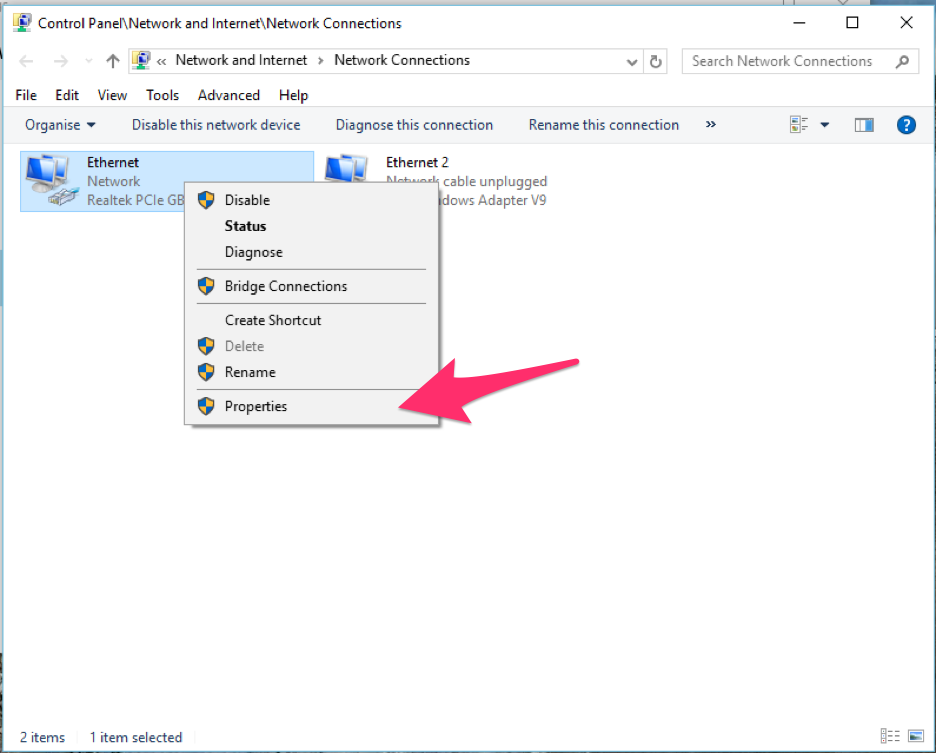
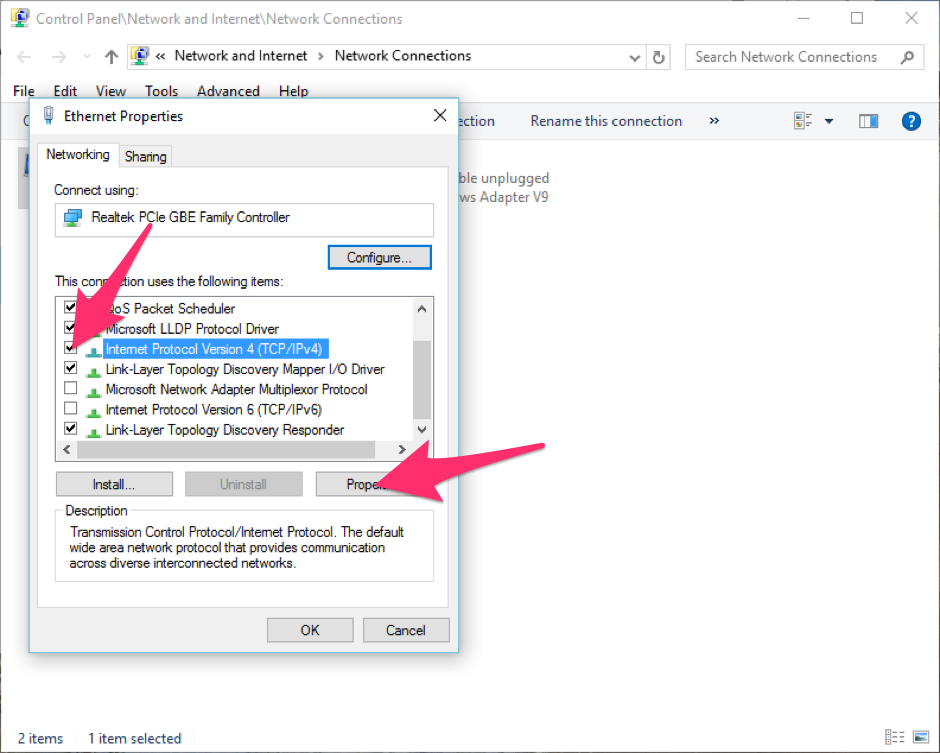
Right click the network adapter you are using and click “properties”
Make sure the Internet protocol version 6 (TCP/IPv6) is Unchecked, if its not then uncheck it.
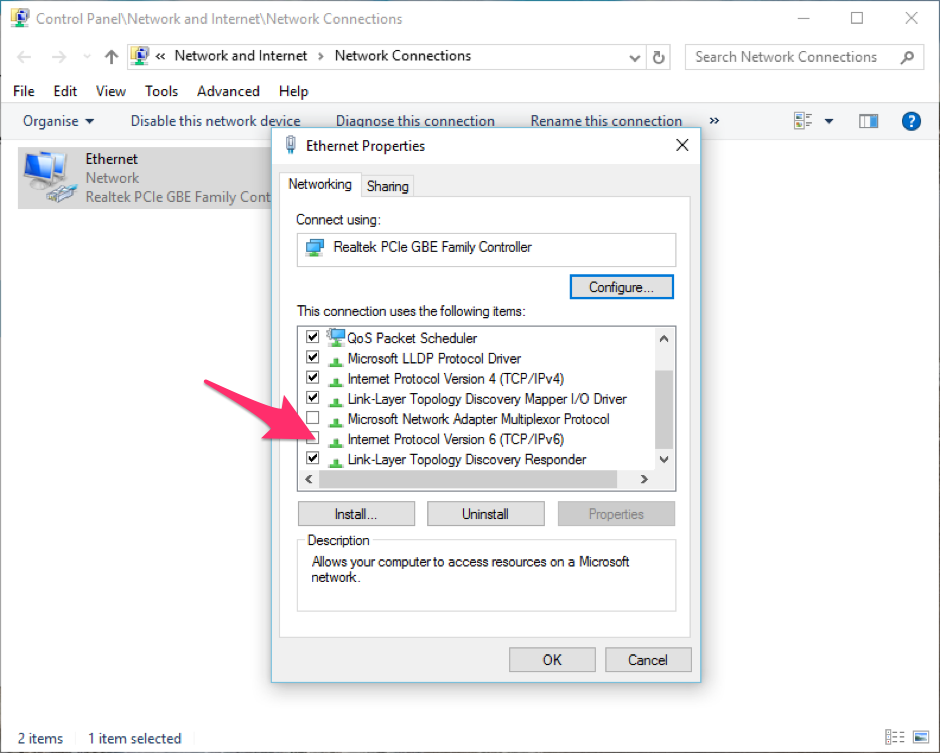
Click on Internet Protocol Version 4 (TCP/IPv4) to select it then push “properties”
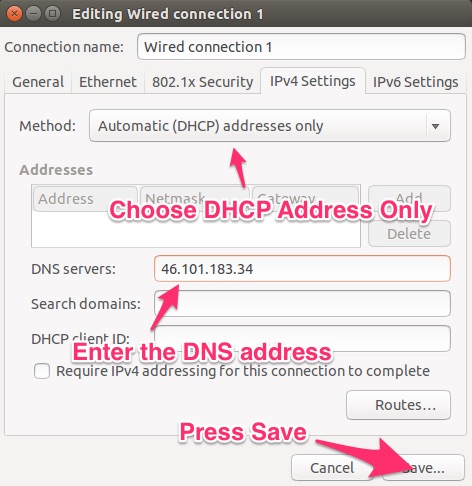
On the GENERAL tab click on “Use the following DNS server addresses“
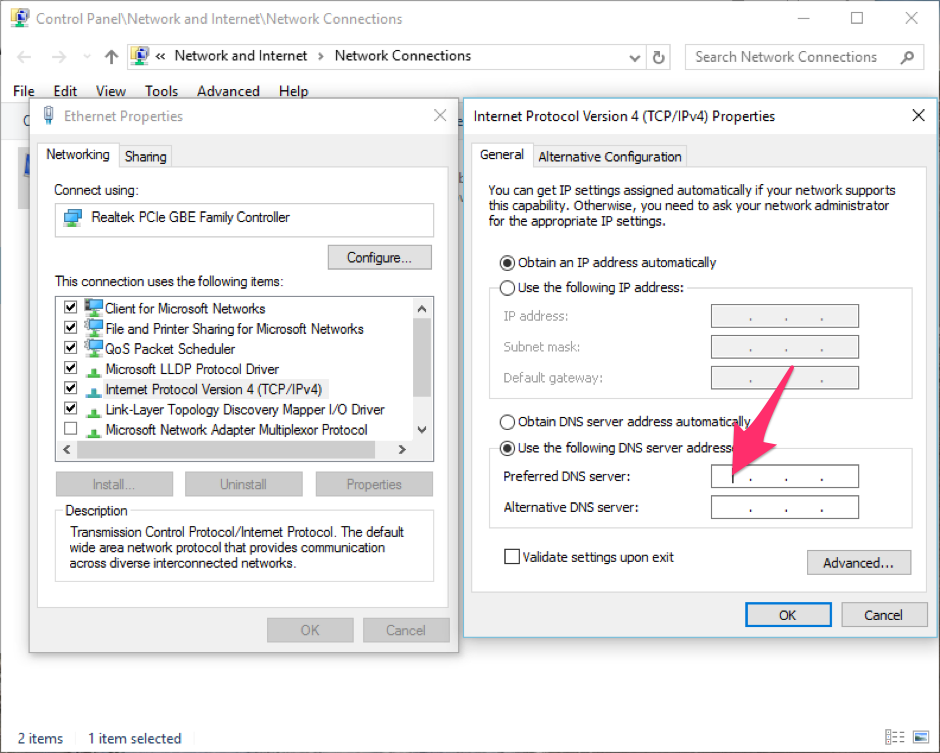
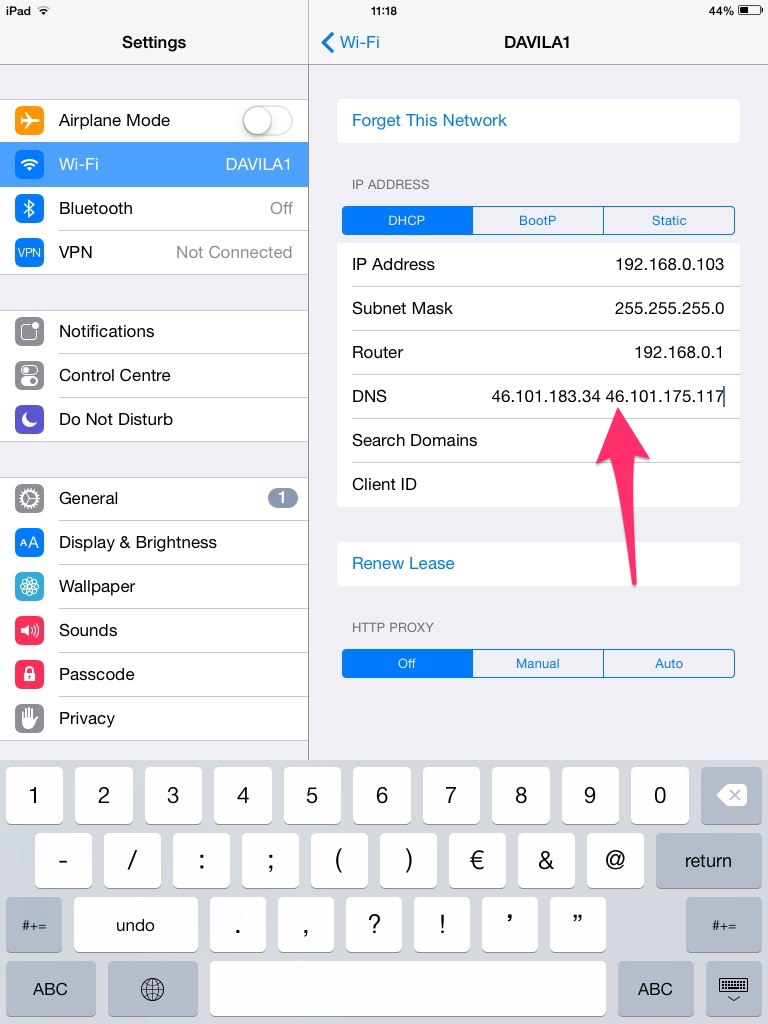
Add the DNS values to both the fields ()
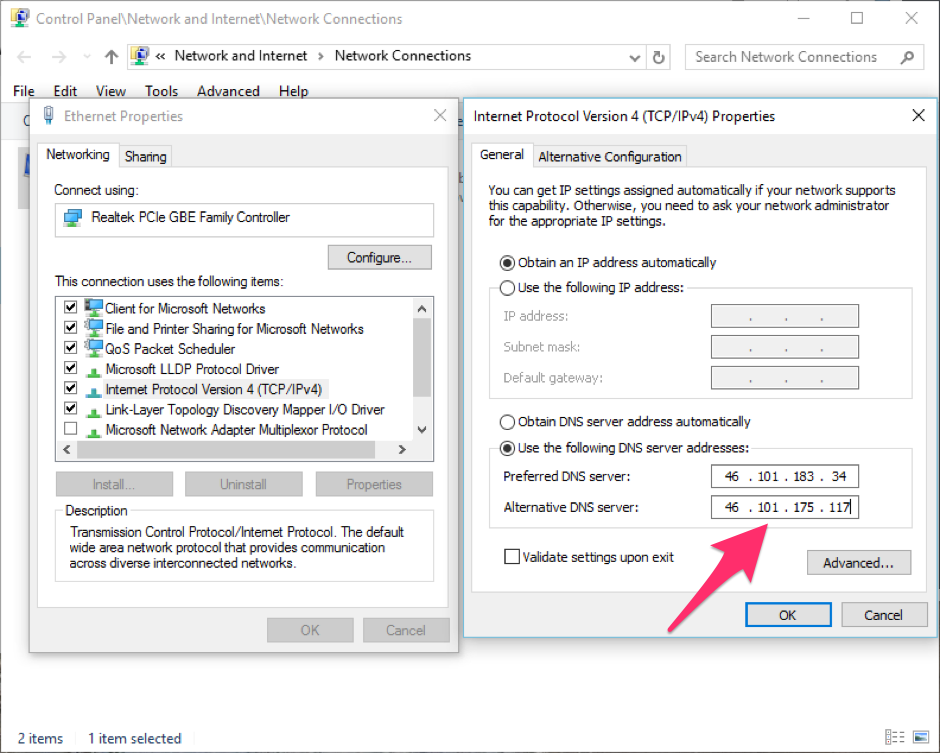
Click the OK button then close all the windows